A cup of happiness
- Katie Bergin

- Jan 26, 2021
- 3 min read
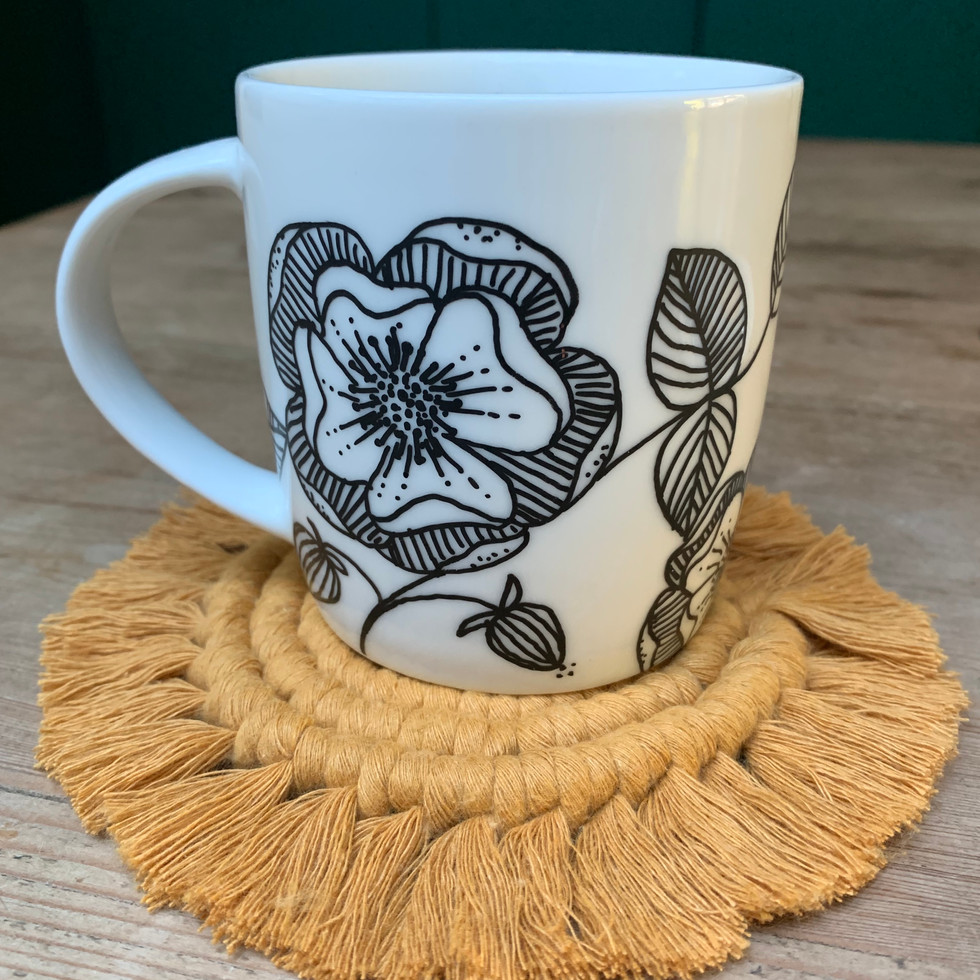
If you are anything like me you love a good cuppa. When making a brew I always choose my favorite mug and this one is my new favourite, designed using porcelain pens.
They are fantastic! So easy to use, they make clean, bold lines and come in all sorts of colours. The best thing is if you make a mistake you can just wipe it off and start again. Once you're happy you just bake the mug in the oven and the ink becomes permanent and dishwasher proof!

You can obviously create any design you wish, you just need a little imagination but if you fancy having a go at making one like mine, here's how. Its easier than it looks!
You will need:
A plain white ceramic mug
A black ceramic pen (try Edding Porcelain Brush Pens, Pack of 6. You get a black and 5 other colours or Baker Ross Porcelain Paint Pens)


STEP 1:
Start your design on one side of the mug near the handle. In the centre make a series of dots about 1 cm in circumference. They don't need to be in a perfect circle, in fact the more random the better.
STEP 2:
Add a series of short lines radiating out from the centre, then add a dot to the end of each of these lines.


STEP 3:
Make 4 petals around the centre by drawing a rounded m shape. They don't all need to be identical. Remember you can wipe off the pen and start again if you are not happy with the shapes.
STEP 4:
To make the petals look as if they are bending over add a small, much shallower m shape on the tip of each petal.


STEP 5:
Repeat steps 4 and 5, adding another layer of petals on the outside of the first. You will probably need to draw about 6 petals this time.
STEP 6:
Fill in the outer petals with a series of lines which radiate slightly into the centre. Add dashes finishing in a couple of dots on the inner petals.


STEP 7:
Repeat this flower design two more times around the mug. Stagger their position and size to make it varied and interesting. You can even have them breaking off the bottom of the mug if you like.
STEP 8:
Add a couple of stems. Start at the bottom of the mug and allow them to twist up behind the flower and off to the side. We are going to add leaves to the stem so think about the position and space you have created.
STEP 9:
Create a leaf shape as shown and fill in with lines to simulate veins. These look more interesting when they aren't too evenly spaced.
STEP 10:
You could fill any gaps you may have with a little bud. Make an upside down teardrop shape and adding a couple of tiny leaves at the top and a couple of dots at the tip. It is easier to draw the bud first before adding a stem.


STEP 11:
When you are happy with your design you are ready to fix it in the oven. Bake the mug at the correct temperature and length of time for your pen type. Remember to use oven gloves when taking the mug out of the oven and allow it to cool before touching it.
STEP 12:
Put the kettle on and make a brew!
I hope you enjoyed this blog post, do let me know! We have lots of ideas and inspiration for you so please do subscribe at the bottom of the page to receive our monthly emails and members-only discount codes.
Thank you for reading,
Katie x


Comments