Bringing Budgies To Life
- Rachel Bath
- Nov 23, 2020
- 3 min read
Our Needle-felted budgie kits have been sent to Australia, America, Canada, Serbia, Germany and all sorts of other far-flung lands this month. It fills us with happiness to think of them flying around the world and being brought to life by other crafters like us. We thought it would be nice to tell you a little bit more about the kit and how it came to be.


This kit was designed by Katie this summer. We had had a lot of requests for other needle-felted creature kits and we wanted to produce something exotic, colourful and summery. Katie started by making mood boards on Pinterest (do follow us on Pinterest if you don't already for even more inspiration) before deciding on a creature. "It's got to be a budgie!" she announced over the phone.

Next, she started making sketches. This is an important part of the product development process for us both. When you are creating something in 3D you really have to draw it many times from different angles to get a good feel for how the model might come together. We fill pages with drawings and doodles, colour references and tear sheets before we move on to the physical making side of things.
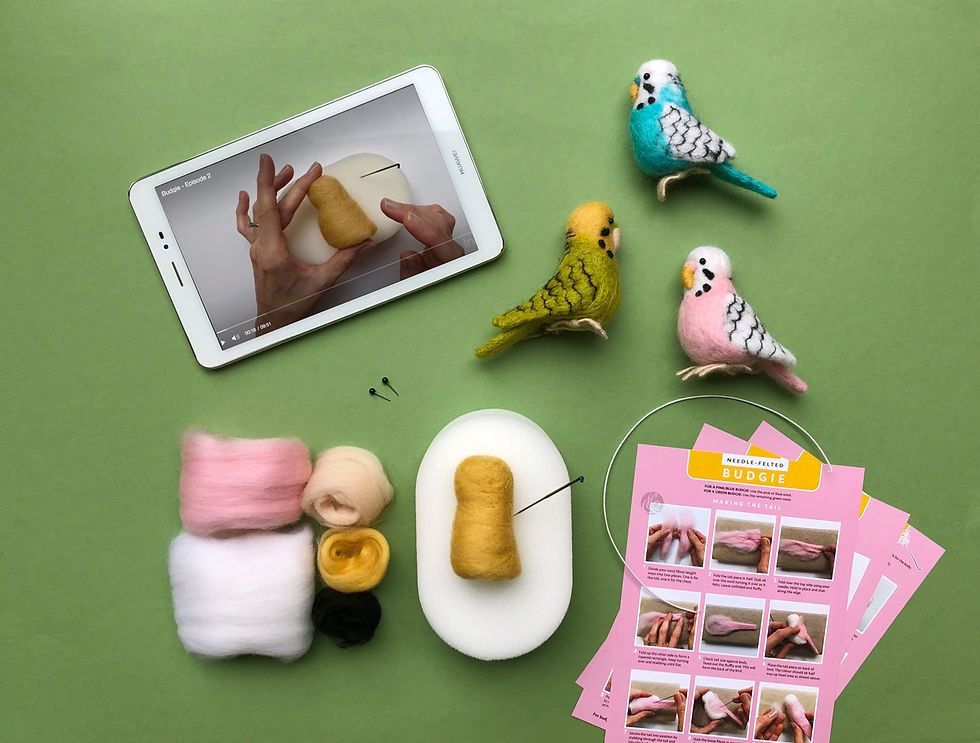
Next we pull swatches of dyed merino wool together to match our colour palette. Of course, this was the point we realised that one budgie would not be enough – we had to have three. Well, how can you choose, they're all so pretty?

The next step is to break down our subject into simplified parts (head, legs, wings etc), making it into pieces that can then be put back together. Deciding how best to attach the separate bits to each other is usually a process of trial and error. This takes place over a few days, often with the radio on and a cuppa, so taking quick photos as we go is a good way to remember the steps! It is at this point we can tell how complicated a model is going to be and whether it will work well as a kit.

When we are sure the model works, we remake it, shooting each and every step so that we can compile a comprehensive step-by-step card to go in the kit. This takes a lot of time and patience and a steady hand.


Once we have a finished project and all of the steps ready to go, we lay out the step-by-step card and the box labels, choosing coordinating colours and writing up the process as clearly as we can. For this, we use Adobe InDesign and Photoshop.
Every one of our labels fits into a template that Katie created to wrap around our boxes. This is where Katie's background in packaging design and my background in publishing comes in handy. There's a lot to think about when creating a product label: how eye-catching is it? How does our branding stand out? How can we describe the project and the kit contents in a concise way? Can we indicate how long it takes to make? And so on and so forth. Our label design has gone through several stages and revisions to get to where it is now but we are really happy with it and hopefully it will stand the test of time...

Then we make the model again and film the process so that our customers can tune in and watch if they get at all stuck. You can check out the videos by clicking the menu above. Filming is still pretty new to us and something we hope to get better at in the new year. There's always something new to learn when you have your own business and you can't do everything at once, or expect to get everything right first time. But we are definitely enjoying the journey!
And that's it. That's how we go from an idea to a finished product... It is so satisfying bringing a ball of wool and a bright idea to life. If you have an idea for a craft product you should go for it! And if you need any tips or ideas feel free to get in touch. We would love to help if we can.
If you want to find out about more design ideas, discover new projects, free tutorials or up-coming workshops, please subscribe at the bottom of the page to receive our monthly emails.
Have a great day and see you soon,
Katie & Rach x


Comments