Needle Felted Floral Letter Tutorial
- Rachel Bath
- Apr 13
- 3 min read
Create pretty felted monograms using up small scraps of leftover wool and any fabric you have lying around. It's so easy and looks really effective. Find a downloadable alphabet for you to print out at the end of the post.

YOU WILL NEED:
A piece of fabric - you can use any fabric you like but the looser the weave, the easier it will be to felt.
A printout of your chosen letter - see download link at the bottom of this post.
A sharp pencil.
A pair of scissors.
A fine triangular felting needle - we used a 40 gauge, which is the standard needle inside our beginner needle felting kits.
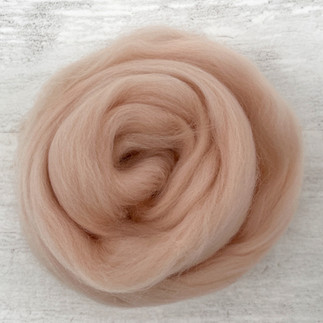
Scraps of leftover wool fibre.
An embroidery hoop.
TOP TIP:
Think about your colour palette - a limited selection of 4-6 colours can be quite subtle and stylish. But why not choose more colours if you want to make a brighter statement? It's a good idea to choose your wool colours before you start. See the bottom of this post for suggestions.
STEP 1
Go to the bottom of the post and download the alphabet PDF. Choose the letter you want to use and print it out. Our letters are 8cm tall to fit inside a 6" embroidery hoop but you can resize the letter to suit the size of your project. Cut it out carefully.
STEP 2
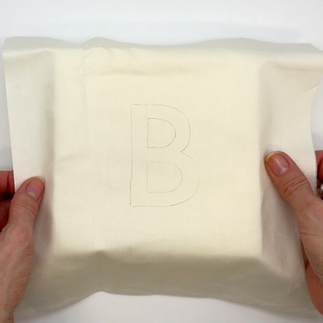
Draw around your letter onto your fabric using a sharp pencil to get a subtle, fine outline.
STEP 3
Place your fabric onto a sponge or a foam felting mat.


STEP 4
Roll a tiny wisp of wool fibre in your fingers to make a neat ball. It can help to moisten your fingers first. Place this onto your design and carefully felt the wool ball until it bonds to the fabric. Add two more balls to make three petals.
STEP 5
Add a smaller ball in a contrasting colour to the centre to create a flower. Its should look like some petals are hidden behind the edge of the letter. This will help to create a floral frame design.


STEP 6
Repeat this simple process to create a second small flower next to the first. You want your flowers to crowd together. Don't worry if some petals slightly overlap the letter, this can look really lovely.
STEP 7
An easy way to fill spaces is to felt even smaller balls of wool in little clusters to resemble berries. Make a few small balls before you attach them so that you can make them all roughly the same size.


STEP 8
Continue adding flowers around the edge of your letter motif. Add small leaves into the spaces too.
STEP 9
Use thin twists of wool fibre to create vines or stalks to help delineate the edge of the design.


STEP 10
Frame your artwork. An easy way to do this is by using an embroidery hoop. But you could use any frame you like or stretch it over a small blank canvas and staple it to the back.


COLOUR PALETTE IDEAS
I have pulled together some colour palettes from our merino wool collection to give you some inspiration. All of these colours can be purchased in 25g lengths for just £1.70 each.
Simply head to our WOOL SHOP to have a look.
ICY COOL
Ash, Candy floss, Elderberry, Eggshell, Teal


SUMMER BRIGHTS
Rose, Emerald, Gooseberry, Peach, Pumpkin, Sunset


AUTUMNAL TONES
Hound, Olive, Elderberry, Oyster, Scarlet, Rust


DOWNLOAD YOUR ALPHABET HERE

Click the link below to download our alphabet PDF and then print out the letters you want to use. They are all in bold black so that you can either cut your letter out or trace it directly through the fabric using a lightbox. Feel free to resize your letter before you print it too.